

I never knew the dish called Kalthappam or Cookerappam till I got married. I must say that marriage to HD did open up a whole variety in food. For us, food is very limited to maybe a pazhampori, pinjiyappam and/or ullivada for snack time, and neychor and erachi curry for lunch time. We don’t even have biriyani, even though we are a part of Malabar! Our main specialty is the Pathiri and that is something that our side women can churn out whenever given the chance, though I can’t include myself in it. Hehe… Umma herself learned a lot after she came here and was staying with a Kozhikodan family, and then from the very minimal friend circle she had over here.
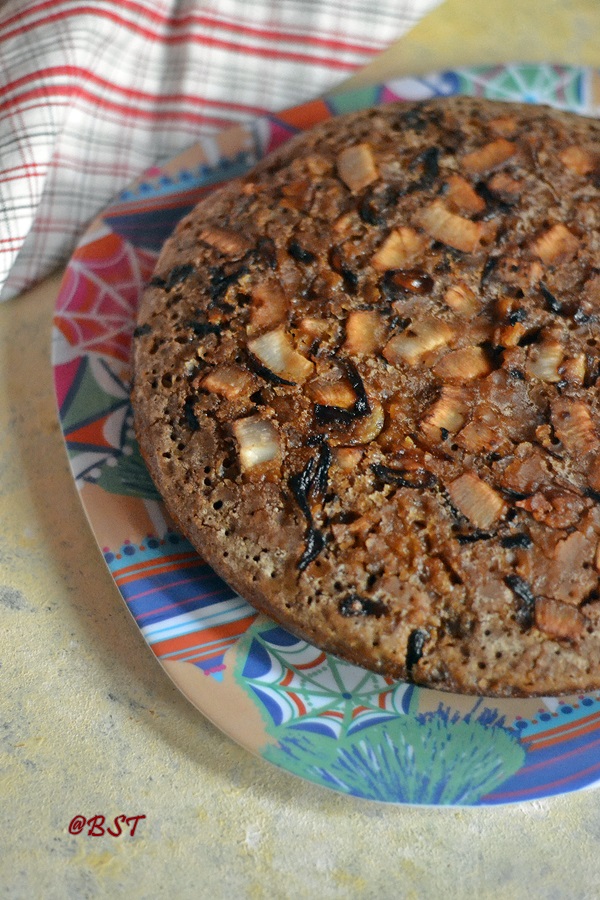
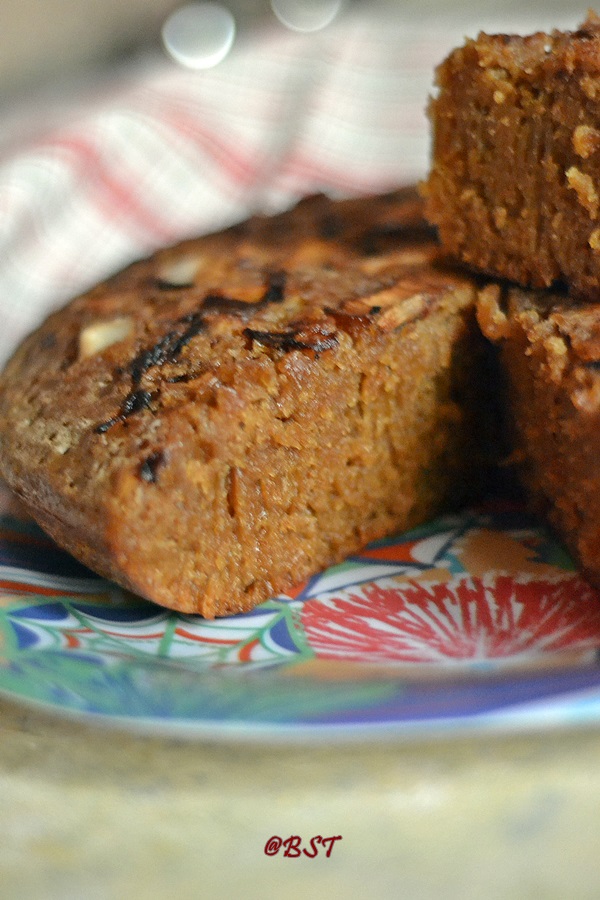
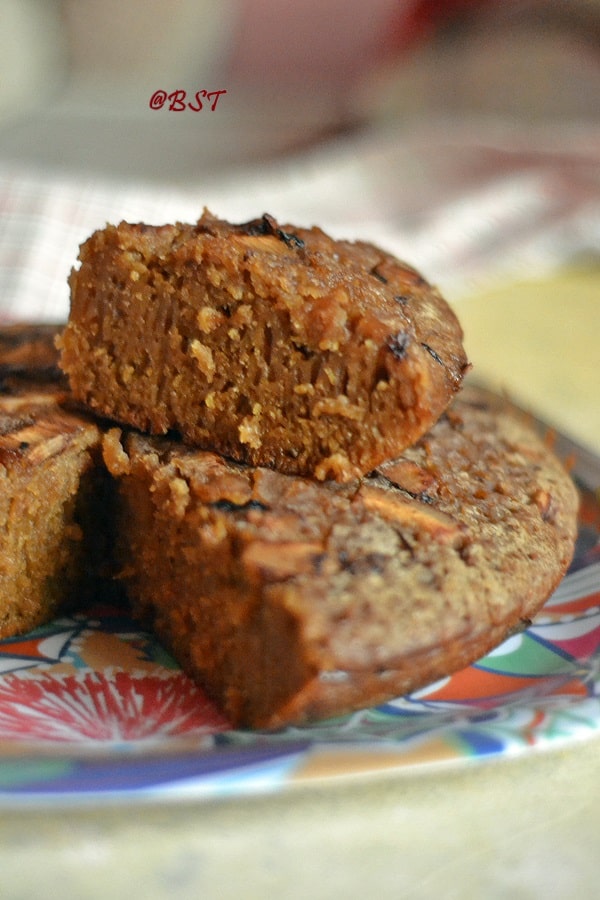
Since we had landed during the evening during our first trip back home, we were treated to a wide range of palahaarams for chai time. Two things I fell in love with was this Mutta Porichath and then the Kalthappam, which his aunt called “cookerappam” because it is usually made in a pressure cooker, sans the pressure. Most of the evenings, she would make this effortlessly and I would be in awe as to how quickly and perfectly it would be done. The main highlight of this snack are those gorgeous lines – aar, as they are called – that can be seen once cut. The next is its chewy texture. I have eaten this snack from so many places, whether homemade or at eateries outside, but nothing can beat what she makes, period!
I have been trying to perfect this since long but somehow it just never turned out as good as I wanted it to be. When I asked ammayi (that’s what we call her…), she just said that adding baking soda when the whole mixture is hot does the trick. She would use a recipe that had raw rice and cooked rice added, however since we cook matta rice at home, I discovered that even a tablespoon of it was making my Kalthappam super sticky. I had first tried with raw rice or pachari, and though it did taste good, I never got those lines. Then I read that Jeerakashala rice, which is used to make Thalassery biriyani, is the best for this. But when used alone, it doesn’t give the softness and cooked matta rice was driving me up the wall. That is when Famidha shared on her IG stories as to how she makes her Kalthappam adding aval or rice flakes instead of cooked rice – what a brilliant idea! Her steps still reminded me of how ammayi had demonstrated it to me. Almost during that time, Vinee also did a try with her mother’s recipe and made the Kalthappam in a non-stick pan, which made this dish even simpler!
So basically these are some of the tips to make a good Kalthappam, which has those beautiful stripes:
- The batter needs to be super smooth, so no grainy bites in it.
- If you want to use cooked rice instead of the aval, use parboiled variety. Please, no matta rice…
- Once the batter is ground, it will be lukewarm. The jaggery syrup has to be added hot and immediately the baking soda has to follow.
- The batter has to be hot as you start cooking it. So always have everything in hand to get started.
- Last but not the least, pour the batter from a little height. Not too much that it splatters all over, but enough for the sides to start settling.
The Kalthappam would still taste amazing even if you don’t get the stripes. But somehow success of this dish lies in those lines. Hehe… I remember I had a guest post long time ago with a similar recipe. I wonder where she is… Off to the recipe…

Kalthappam | Cookerappam ~ Malabar Rice Cake
Ingredients
- 2 cups jeerakashala rice soaked for 4-6 hours
- 1/4 cup rice flakes aval, soaked for 15 minutes
- 3 cardamom
- 1/2 tsp cumin seeds
- 1 1/2 cups water
- A pinch of salt
- 350 gm jaggery melted with 3/4 cup water
- 1/4 tsp baking soda
- 1 1/2 tbsp coconut oil/ ghee
- 4 shallots peeled and thinly sliced
- 10-15 crushed cashewnuts
- 1/4 cup coconut bites
Instructions
- Drain the rice and aval. Add it into a blender along with cardamom, cumin, salt and water. Blend till the mixture is smooth.
- Meanwhile, melt and strain the jaggery.
- Immediately pour the hot jaggery syrup into the rice mixture. Add the baking soda and whisk till completely combined.
- Heat oil in a non-stick pan. Fry the shallots, cashew nuts and coconut bites till browned. Drain out. Add more oil or ghee if required.
- Pour the warm mixture from a height onto the hot pan, so that it starts spluttering as it settles. Reduce the flame to simmer and close with a tight lid wrapped in a towel to avoid any water dripping onto the appam.
- After five minutes, sprinkle the fried onions and coconut on top of it. Close and cook till a knife tester comes out clean from the center and you see bubbly texture on top.
- Serve warm with a cup of chai.
I love deserts with jagery. THis sounds and looks so good.
I can’t believe you mentioned me! I came looking for an oven version ????
Of course because it is your idea. 🙂